The Design Process
|
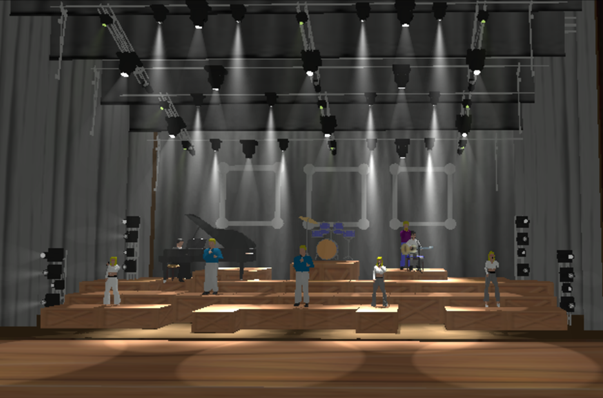
Augmented 3D Visualization When I first started this project, I decided to build everything to scale in GrandMa 3D OnPC software using the house stock of intelligent fixtures. Taking into consideration the inventory, this first phase was to create a functional aesthetic that would A) look good and B) be practical enough to rig based off of our inventory (Cable and power run included). The initial design is depicted on the right minus the lights on the back square panels. After coming to this design that was going to be functional, we decided to go with this design which began with the next phase of actually creating the plot. |
|
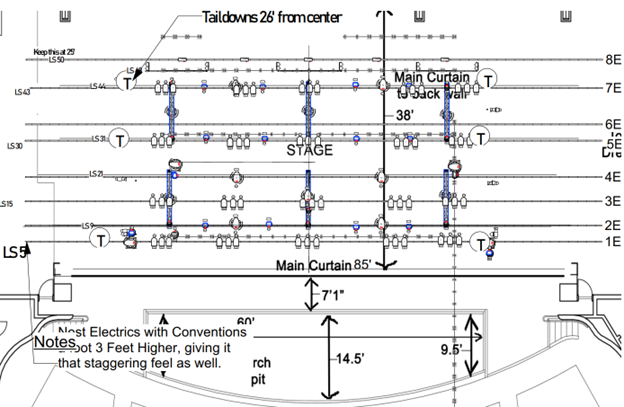
The Plot Paperwork |
|
|
|
The focus of this design was to primarily be used by intelligent fixtures. However, for more uses and freedom to have the movers for flash and trash, a basic 3-colored stage wash was hung above the main system with tail downs in order to create a general wash and coverage if needed.
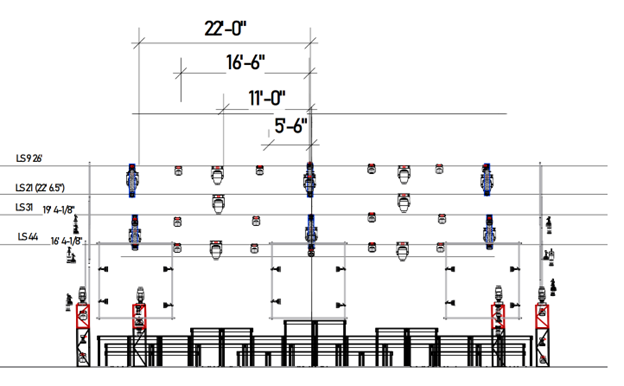
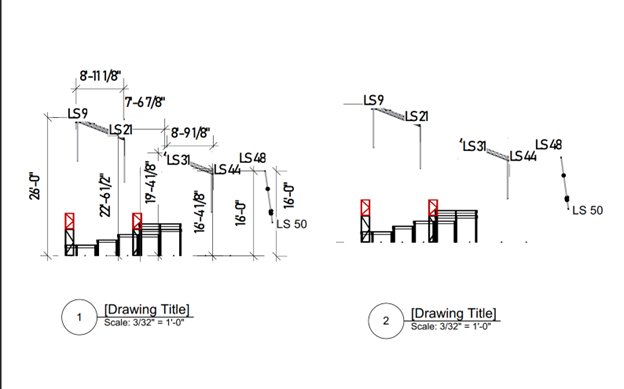
A key design element that I went for was a slope from the upstage side to the downstage side to create a forced perspective. The three metal backdrops in the back were originally 10' * 10* frames that did get changed to 10' x 1.5' frames in order to create a more appealing aesthetic. These frames got changed after being pre-built and deciding that it looked to awkward. In order to make the design flow, I placed these new sized frames in line with the angular trusses to create a continuous line that flowed from above head to the back drop. |
|
Light Hang Process
|
|
As stated prior, there were a couple of changes that happened during the light hang. With how I had the cable runs, everything ran smoothly on the ground before we flew it out. Then we ran into technical problems where we had to run some of the data and keep certain systems of fixtures separate. Understanding these problems prepared me for future hangs and designs and how to avoid them. After a little bit of stress and troubleshooting, we got to the show and everything took off from there.
|
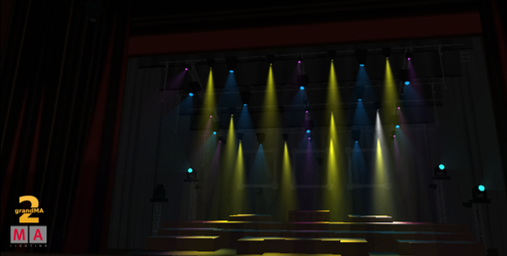
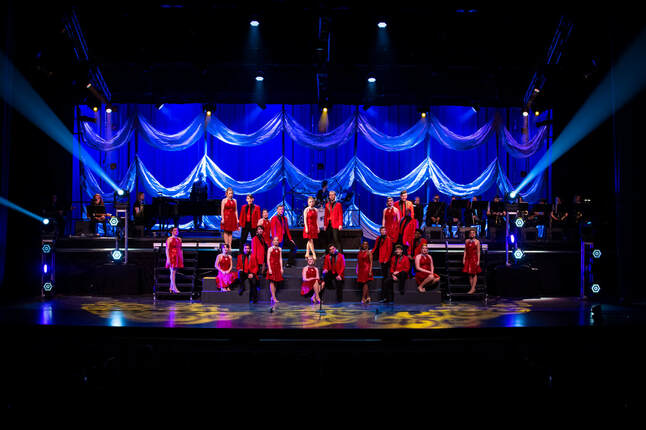
Final Product
|
As stated above, there were a couple of design elements that had to change in order to get the end result. The first big design element that I changed was the frame size of the back panels to be way more rectangular than square. The other thing we ended up changing for the rig was the original trim heights in order to create the slant. After light hang re realized that there was not that much room for Cyc backdrops, and it made the stage feel smaller. In order to fix this, we decided to raise the slant to make the backdrop bigger which helped the overall design as a whole (in my opinion).
|
|
|
|
